
Dead skin flakes
From your scalp
Sebum (natural oil)
Secreted by your hair and skin
Hairspray, dry shampoo, mousse
Left behind during styling
Dust and fibers
Floating in the air or coming off towels, clothing, pets
Lint and debris
From fabrics, tissues, even carpet
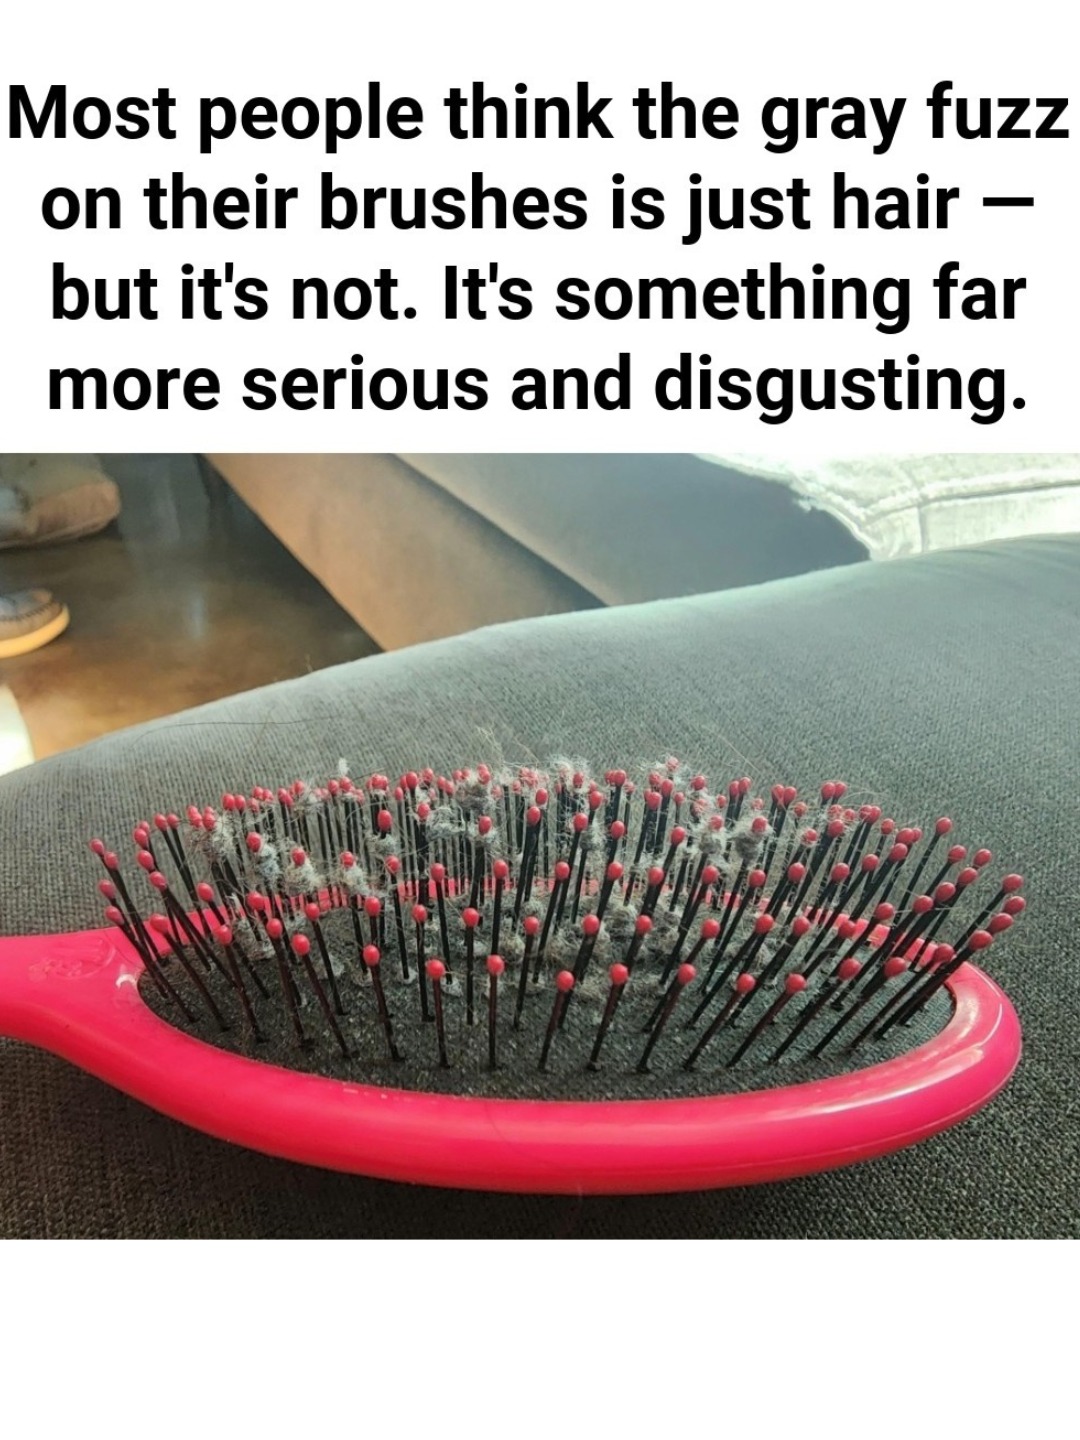
This mix creates a sticky, slightly smelly buildup over time — especially if your brush lives on the counter next to toothpaste splatter and shower steam.
In short:
Your brush isn’t just collecting hair — it’s collecting life.
⏳ How Often Should You Be Cleaning Your Brush?
Spoiler: More often than you think.
Quick Cleaning (Removing Loose Hair):
Do this daily or every time you use your brush
Use a comb, bobby pin, or small tool to gently remove strands and debris
Don’t skip this — it prevents bacteria buildup and keeps airflow between bristles
Weekly Deep Clean:
Soak in warm water + gentle shampoo or dish soap
Scrub with an old toothbrush
Rinse thoroughly
Let air-dry completely before using again
Monthly Intensive Clean:
For heavy product users or wooden brushes
Use baking soda or vinegar to lift stubborn grime
Avoid soaking wood handles — they can warp or crack
Replace worn brushes with loose or bent bristles
✅ Pro Tip: If your brush smells funky after cleaning — toss it. That’s mold territory.
🚿 Step-by-Step: How to Clean Your Hairbrush Like a Real Human Adult
Step 1: Remove All Hair
Use a comb, dental floss, or pointed object (like a pencil) to pull out trapped hair from between the bristles.
This is oddly satisfying — like cleaning your keyboard or picking fuzz out of the dryer vent.
Step 2: Soak in Soapy Water
In a bowl:
Mix warm water
A few drops of shampoo or mild dish soap
Add a splash of baking soda for extra degreasing power
Soak your brush for 10–15 minutes — not too deep if it has a wooden handle.
Step 3: Scrub the Bristles
Grab an old toothbrush or makeup brush — and scrub the bristles under running water.
You’ll see:
The cloudy residue lift away
Bristles look fresher
Your reflection in the mirror suddenly feels cleaner
Avoid using harsh chemicals or bleach — they damage the bristles and irritate your scalp.
Step 4: Rinse and Dry Properly
Rinse until the water runs clear — no soap bubbles left.
Then shake off excess water and lay the brush flat on a towel — bristle-side down .
Let it air dry overnight.
⚠️ Never use a wet brush — dampness breeds mold and bacteria.
🪶 Bonus Tips for Different Brush Types
For plastic brushes :
Safe to fully submerge
Can withstand deeper cleaning agents
For wooden brushes :
Never soak the handle
Spot-clean the bristles only
Wipe the wood with a damp cloth — then dry immediately
For natural boar bristle brushes :
Avoid aggressive soaps
Use diluted shampoo
Air dry completely before reusing
Also, consider replacing your brush every 6–12 months — especially if the bristles are worn or discolored.
🧼 Why You Should Care About a Dirty Hairbrush
Brushing with a dirty brush means:
Re-depositing oils and dirt onto clean hair
Clogging pores on your scalp
Causing breakouts around your temples or forehead
Increasing frizz and dullness
Spreading dandruff or irritation
In short:
A clean brush = healthier hair and scalp.
And sometimes, that’s the missing piece between good hair days and bad ones.
For Complete Cooking STEPS Please Head On Over To Next Page Or Open button (>) and don’t forget to SHARE with your Facebook friends
ADVERTISEMENT
