
Preheat & Prep the Pan: Position a rack in the center of your oven and preheat to 425°F (220°C). Line an 8×8-inch metal baking pan with heavy-duty aluminum foil, allowing the foil to overhang two opposite sides for easy lifting later. Lightly spray the foil with nonstick cooking spray.
Melt the Butter: Cut the butter into 4–6 chunks and place them evenly in the foil-lined pan. Carefully transfer the pan to the preheating oven and bake for 5–7 minutes, just until the butter is fully melted and bubbling around the edges. Remove the pan carefully using oven mitts and set it on a heatproof surface. (Caution: The pan and butter will be very hot.)
Mix the Batter: While the butter melts, combine the self-rising flour and granulated sugar in a medium mixing bowl. Whisk briefly to distribute the sugar. Pour in the whole milk and stir gently with a spoon or silicone spatula just until the flour is moistened. The batter will be thick and slightly lumpy—this is perfect. Do not overmix, as it will toughen the biscuits.
Pour & Spread: Immediately pour the batter directly into the hot pan, spreading it evenly over the melted butter. Use a spatula to gently nudge it into the corners. The butter will naturally pool around the edges and partially cover the top—this is exactly what creates the crispy base and golden finish.
Score the Biscuits: Using a butter knife or the edge of a spatula, lightly score the batter into 9 even squares (3 rows by 3 columns). Do not cut all the way through to the bottom; you’re simply marking where the biscuits will naturally separate after baking.
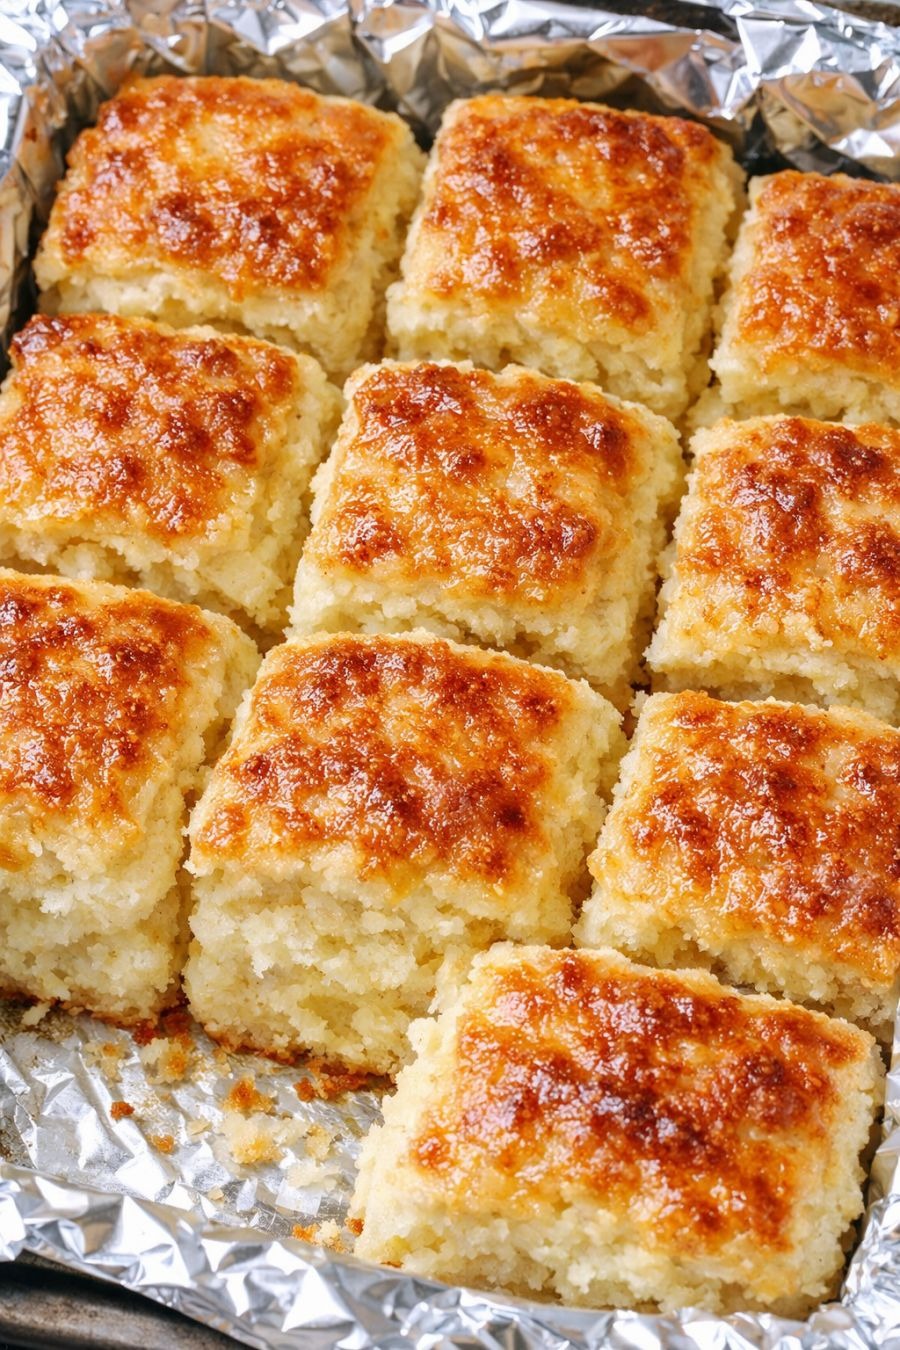
Bake to Golden Perfection: Return the pan to the center rack and bake for 20–25 minutes, until the biscuits are tall, the tops are deeply golden and crisp, and the butter is gently sizzling around the edges.
Rest & Serve: Remove from the oven and let the biscuits rest in the pan for 5–10 minutes. This allows them to set, finish steaming internally, and soak up just enough butter for maximum flavor. Use the foil overhang to lift the entire slab onto a cutting board, then gently pull or cut along the scored lines into 9 squares. Serve warm.
Serving Suggestions
Sweet finishes: Drizzle with warm honey, fruit preserves, or a light dusting of powdered sugar
Savory pairings: Serve alongside fried chicken, sausage gravy, shrimp and grits, or a classic Southern breakfast
Beverage matches: Freshly brewed sweet tea, black coffee, or a glass of cold buttermilk
Presentation tip: Arrange on a linen-lined basket or wooden board for a rustic, family-style spread
Occasion-ready: Ideal for weekend brunch, holiday breakfasts, potluck sides, or cozy family dinners
You Must Know
Self-rising flour is non-negotiable: This recipe’s rise and texture rely on the precise leavening and salt already balanced in self-rising flour. Do not substitute all-purpose flour without adjusting the recipe.
Hot pan technique matters: The butter must be fully melted and the pan hot before adding batter. This jumpstarts the bottom crust and prevents sogginess.
Don’t overmix the batter: Stir just until combined. A few dry streaks or lumps are fine. Overworking develops gluten, which makes biscuits dense.
Score, don’t cut: Lightly marking the batter allows the biscuits to bake together, keeping them moist and fluffy, then pull apart cleanly after resting.
Rest before separating: Cutting or pulling too soon will cause them to tear and lose their steam structure. 5–10 minutes is essential.
Storage Tips
Best served fresh: These biscuits peak within 2 hours of baking when the crust is crisp and the interior is steaming.
Room temperature: Store completely cooled biscuits in an airtight container or wrapped tightly in foil for up to 1 day.
Reheating: Refresh in a 350°F (175°C) oven for 5–8 minutes to restore the crispy bottom and warm interior. Avoid microwaving, which softens the crust and makes them chewy.
Freezing: Not ideal due to the high butter content and tender crumb, but baked biscuits can be frozen for up to 1 month. Reheat from frozen at 350°F for 12–15 minutes.
Make-ahead strategy: Mix dry ingredients and measure milk in advance. Combine and bake when ready for optimal texture.
For Complete Cooking STEPS Please Head On Over To Next Page Or Open button (>) and don’t forget to SHARE with your Facebook friends
ADVERTISEMENT
