
Step 1: Prep Your Station
✅ Crack eggs into a bowl.
✅ Add a pinch of salt.
✅ Whisk just until combined—you want to break up the yolks, not incorporate air. Over-whisking can make eggs tough.
✅ Have your butter, spatula, and plate ready. Timing matters.
Step 2: Low Heat Is Non-Negotiable
✅ Place a non-stick or well-seasoned carbon steel pan over low to medium-low heat.
✅ Add butter and let it melt slowly—don’t let it brown.
✅ The pan is ready when the butter foams slightly but doesn’t sizzle aggressively.
🔥 Why low heat? Eggs coagulate at around 145–155°F (63–68°C). High heat pushes them past that threshold too quickly, squeezing out moisture and creating rubbery texture. Low heat gives you control.
Step 3: The Gentle Stir Technique
✅ Pour eggs into the pan.
✅ Let them sit undisturbed for 10–15 seconds until a thin layer begins to set at the edges.
✅ Using a rubber spatula or silicone spoon, gently push the set eggs from the edges toward the center.
✅ Tilt the pan slightly to let uncooked egg flow into the empty spaces.
✅ Repeat: push, tilt, fold. Slowly. Gently. Patiently.
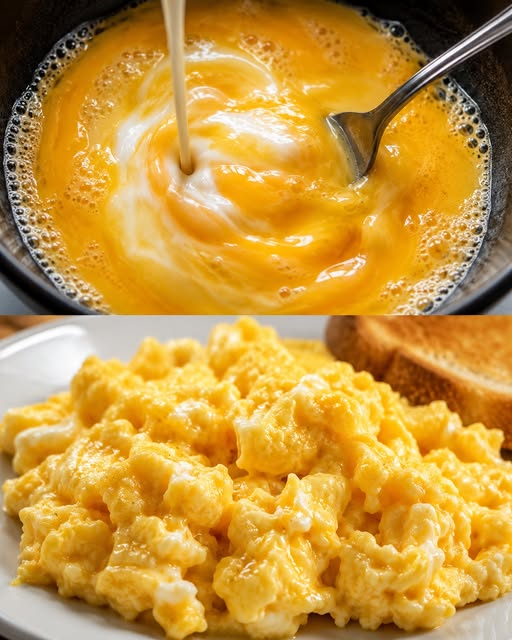
✅ What you’re aiming for: Small, soft curds that are still slightly wet on the surface. The eggs will continue cooking from residual heat after you remove them from the pan.
Step 4: Know When to Stop (The Most Important Step)
✅ Remove the pan from heat when eggs look just slightly underdone—they should still look a little wet and glossy.
✅ Transfer immediately to a warm plate.
✅ Let them rest for 30 seconds. They’ll finish cooking gently from carryover heat.
🎯 Visual cue: Perfect scrambled eggs should look like soft, shiny curds—not dry, matte chunks. If they look “done” in the pan, they’ll be overdone on the plate.
Step 5: Finish and Serve
✅ If using herbs, cream, or cheese, fold them in during the last 15 seconds of cooking.
✅ Serve immediately on warm toast, with avocado, or alongside crispy bacon.
✅ Season with a final tiny pinch of flaky salt or cracked black pepper if desired.
🧠 The Science: Why This Method Works
Understanding the “why” helps you master the “how.”
Egg Proteins and Heat
Eggs are mostly protein and water. When heated:
Proteins unfold and bond together (coagulation)
Water gets trapped in the protein network
Too much heat = proteins tighten too much = water squeezes out = dry, rubbery eggs
Low heat + gentle stirring = proteins coagulate slowly = water stays trapped = silky, moist eggs.
The Role of Fat
Butter does more than add flavor:
It coats egg proteins, slowing coagulation
It conducts heat gently, preventing hot spots
It adds richness that balances the eggs’ natural sulfur notes
Why Salt Timing Matters
Adding salt too early can:
Break down egg proteins prematurely
Draw out moisture, leading to watery eggs
Best practice: Salt just before cooking, or sprinkle on finished eggs.
🔄 Variations to Try (Once You’ve Mastered the Basics)
French-Style Scrambled Eggs (Crémeux)
Use a double boiler or very low heat
Stir constantly with a wooden spoon for 10–15 minutes
Finish with a knob of cold butter and a splash of crème fraîche
Result: Ultra-creamy, custard-like eggs perfect for toast points
American Diner-Style (Fluffy Curds)
Use medium heat instead of low
Stir more vigorously to create larger, fluffier curds
Add a splash of milk or cream while whisking
Result: Light, airy eggs with distinct curds—classic comfort food
Herb & Cheese Scramble
Fold in fresh chives, parsley, or tarragon at the end
Add grated Gruyère, cheddar, or goat cheese just before removing from heat
Result: Flavor-packed eggs that feel special without extra effort
Smoky Spanish-Style
Sauté diced chorizo or smoked paprika in the butter before adding eggs
Fold in roasted red peppers or tomatoes at the end
Result: Bold, savory eggs with a Mediterranean twist
❌ Common Mistakes (And How to Avoid Them)
Mistake
Why It Happens
The Fix
High heat
Impatience; thinking “faster = better”
Use low to medium-low heat; trust the process
Over-stirring
Fear of eggs sticking; wanting “more action”
Gentle, deliberate folds; let eggs set briefly between stirs
Cooking too long
Waiting until eggs look “fully set” in the pan
Remove when still slightly wet; carryover heat finishes them
Adding milk early
Belief that milk = fluffier eggs
Skip milk or add just a splash at the end if desired
Using the wrong pan
Stainless steel without enough fat; worn non-stick
Use a good non-stick or well-seasoned carbon steel pan; enough butter to coat
Cold eggs straight from fridge
Convenience
Let eggs sit at room temp 10–15 minutes before cooking for even results
Over-seasoning
Trying to mask bland eggs
Start with a pinch of salt; taste and adjust at the end
🧰 Tools That Help (But Aren’t Required)
✅ Rubber or silicone spatula: Gentle on eggs and non-stick surfaces
✅ Non-stick or well-seasoned pan: Prevents sticking without excessive fat
✅ Small bowl and whisk: For quick, even mixing
✅ Warm plates: Keeps eggs at ideal serving temperature
❌ Not needed: Fancy egg rings, electric egg cookers, or special whisks. Simple tools work best.
For Complete Cooking STEPS Please Head On Over To Next Page Or Open button (>) and don’t forget to SHARE with your Facebook friends
ADVERTISEMENT
